


How to Connect a SOCKS5 Proxy on Android Without a Provider App
Learn how to connect a SOCKS5 or HTTP proxy to Android using Tun2TAP, including proxy credentials, VPN setup and safe location testing.
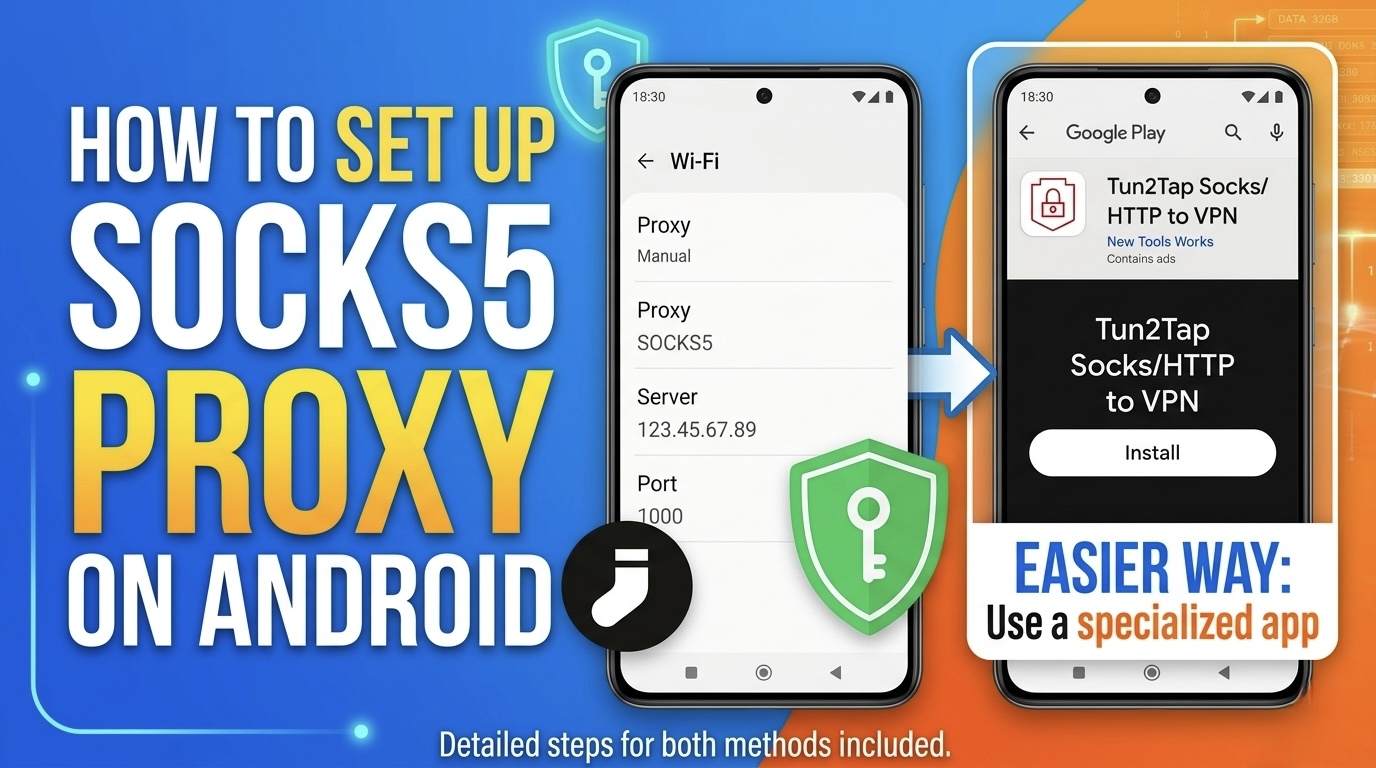
You Don't Need a Proxy Provider's Android App
Connecting a proxy on Android is generally easier than doing it on an iPhone because Android has a larger selection of networking tools that can route traffic through SOCKS5 and HTTP proxies. Some providers have their own mobile applications, while others simply give you the usual proxy details:
Host + Port + Username + Password
But what happens when you've purchased a proxy from a provider that doesn't have an Android app? You can use a third-party VPN/tunnel application that accepts the proxy credentials directly.
One option is Tun2TAP, a type of Android networking tool designed to route traffic through SOCKS and HTTP proxies. The underlying tun2proxy technology supports SOCKS5 and HTTP, including username/password authentication.
There are also other Android clients based on the same concept, including open-source projects such as SocksDroid and ProxyDroid.
What You'll Need
Before starting, get these details from your proxy provider:
Setting | Example |
|---|---|
Proxy type | SOCKS5 |
Host | proxy.example.com |
Port | 12345 |
Username | your_username |
Password | your_password |
Some providers instead use IP whitelisting, meaning there is no username or password. Android's standard Wi-Fi proxy interface is limited and doesn't natively provide a username/password field, which is one reason third-party proxy clients can be useful.
1. Install a SOCKS5-Compatible Android Client
If you're specifically following the Tun2TAP Socks/HTTP to VPN workflow, install the current version from Google play store.
The important capability is that the app must be able to accept:
SOCKS5/HTTP → Android VPN service → device traffic
Android applications using the VpnService API can create a virtual network interface and route traffic through a proxy without requiring root access. SocksDroid and other open-source implementations demonstrate this approach.
2. Add Your SOCKS5 Proxy
Open the proxy application and create a new configuration.
Enter the information supplied by your provider. Some proxy clients also accept a complete proxy URL such as:
socks5://username:password@proxy.example.com:12345
The exact format depends on the application you're using. Other Android proxy clients explicitly support this format for SOCKS5 with authentication.
3. Start the VPN Connection
Once you've saved the configuration, tap Connect/Start.
Android should display a VPN permission prompt because the application needs permission to create the local VPN interface. Approve the request only if you've verified that you're using a reputable application.
Once connected, Android should display the VPN indicator in the status bar. At this point, supported device traffic can be routed through the configured proxy.
4. Check Your Public IP
Don't assume that the setup worked just because the VPN icon appeared.
Open your browser and search:
What is my IP address?
Or use a reputable IP-checking service.
Check:
Public IP
Country
Approximate city/region
ISP/network
The result should correspond to the proxy endpoint you're using. If your normal Nigerian IP is still displayed, the proxy isn't routing the traffic you expected.
5. What If Your Proxy Uses IP Whitelisting?
This is actually common with cheaper proxy packages.
Instead of:
Username + Password
your provider may require:
Your public IP → Added to provider whitelist
The Android proxy application can then connect without credentials. This can be useful for a device that stays on one network, although it's less convenient when your public IP changes frequently.
Android's normal Wi-Fi proxy settings can also handle a manual HTTP proxy without credentials, but they don't natively provide a username/password field and don't provide system-level SOCKS5 configuration.
6. Important: Proxy Location and GPS Location Are Different
This is one part many users misunderstand. A proxy can change the public IP address seen by websites. It does not automatically change the GPS location reported by your phone. Your Android device can still provide its actual location through GPS, Wi-Fi positioning and other sensors.
So you can have:
IP location: United States
while your phone's:
GPS location: Lagos, Nigeria
These are separate signals.
7. Why Your Proxy May Still Disconnect
If your connection works for a few minutes and then stops, check:
Proxy session duration: Some residential proxy services use rotating or session-based endpoints.
Provider balance: Your proxy account may have run out of traffic/credits.
Network changes: Switching between Wi-Fi and mobile data can change connectivity.
Android battery optimization: Some Android manufacturers aggressively stop background applications.
Check:
Settings → Battery → App battery usage
and make sure your proxy client isn't being unnecessarily restricted.
VPN conflict: Android generally allows one active VPN connection at a time, so another VPN application can interfere with your proxy client.
Final Thoughts
Connecting a SOCKS5 proxy to Android is generally straightforward once you understand the difference between the proxy itself and the application used to connect to it. You don't necessarily need your proxy provider to have its own Android application. A compatible VPN-based proxy client can accept your:
SOCKS5/HTTP host + port + authentication
and route supported device traffic through that proxy. For developers, QA engineers and businesses testing location-aware applications, Android's mock-location functionality can then be used separately to simulate test coordinates.
The important thing is to keep these two concepts separate:
Proxy = network/IP routing
Mock GPS = simulated device location
For legitimate testing and development, combining the two can be a useful way to reproduce different network and location scenarios without physically travelling.
Related Articles
How to Connect a SOCKS5 or Residential Proxy on iPhone Using Potatso for Free
Learn how to connect SOCKS5, HTTP and residential proxies to your iPhone using Potatso, including username, password, port and sticky proxy setup.
How to Improve Your iPhone Privacy in Nigeria: Hide Apps, Photos & More
Learn how to protect your iPhone privacy in Nigeria by hiding apps, locking photos, securing WhatsApp and banking apps, and enabling Stolen Device Protection.
WhatsApp Account Banned in Nigeria? How to Avoid a Ban and Get Your Account Back
WhatsApp banned your account in Nigeria? Learn why accounts get banned, how to avoid WhatsApp restrictions and what to do if your account is banned.
Google Play Store Not Downloading Apps in Nigeria? Here's How to Fix It
Google Play Store not downloading apps on your Android phone? Try these practical fixes for stuck downloads, pending apps, slow downloads and failed installations in Nigeria.
WhatsApp Keeps Freezing on iPhone? Here's How to Fix It 2026
Is WhatsApp hanging, freezing, or crashing on your iPhone? Learn the most effective ways to fix slow WhatsApp performance, especially on 64GB and 128GB iPhones running low on storage.
Windows Laptop Takes Too Long to Boot and Runs Slowly? Here’s How to Fix It
Is your Windows laptop taking forever to start or running slowly? Learn the common causes and practical ways to speed up your Windows 10 or Windows 11 PC.
Windows Search Too Slow? This Free Tool Can Find Almost Any File in Seconds
Everything Windows, VoidTools Everything, Windows Search, Windows 11 tips, Windows 10 tips, file search, PC tips, productivity tools, free Windows software
Comments (0)
Leave a comment
Comments cannot be edited or deleted after posting. Please review your comment before submitting.
No comments yet. Be the first to share your thoughts!